
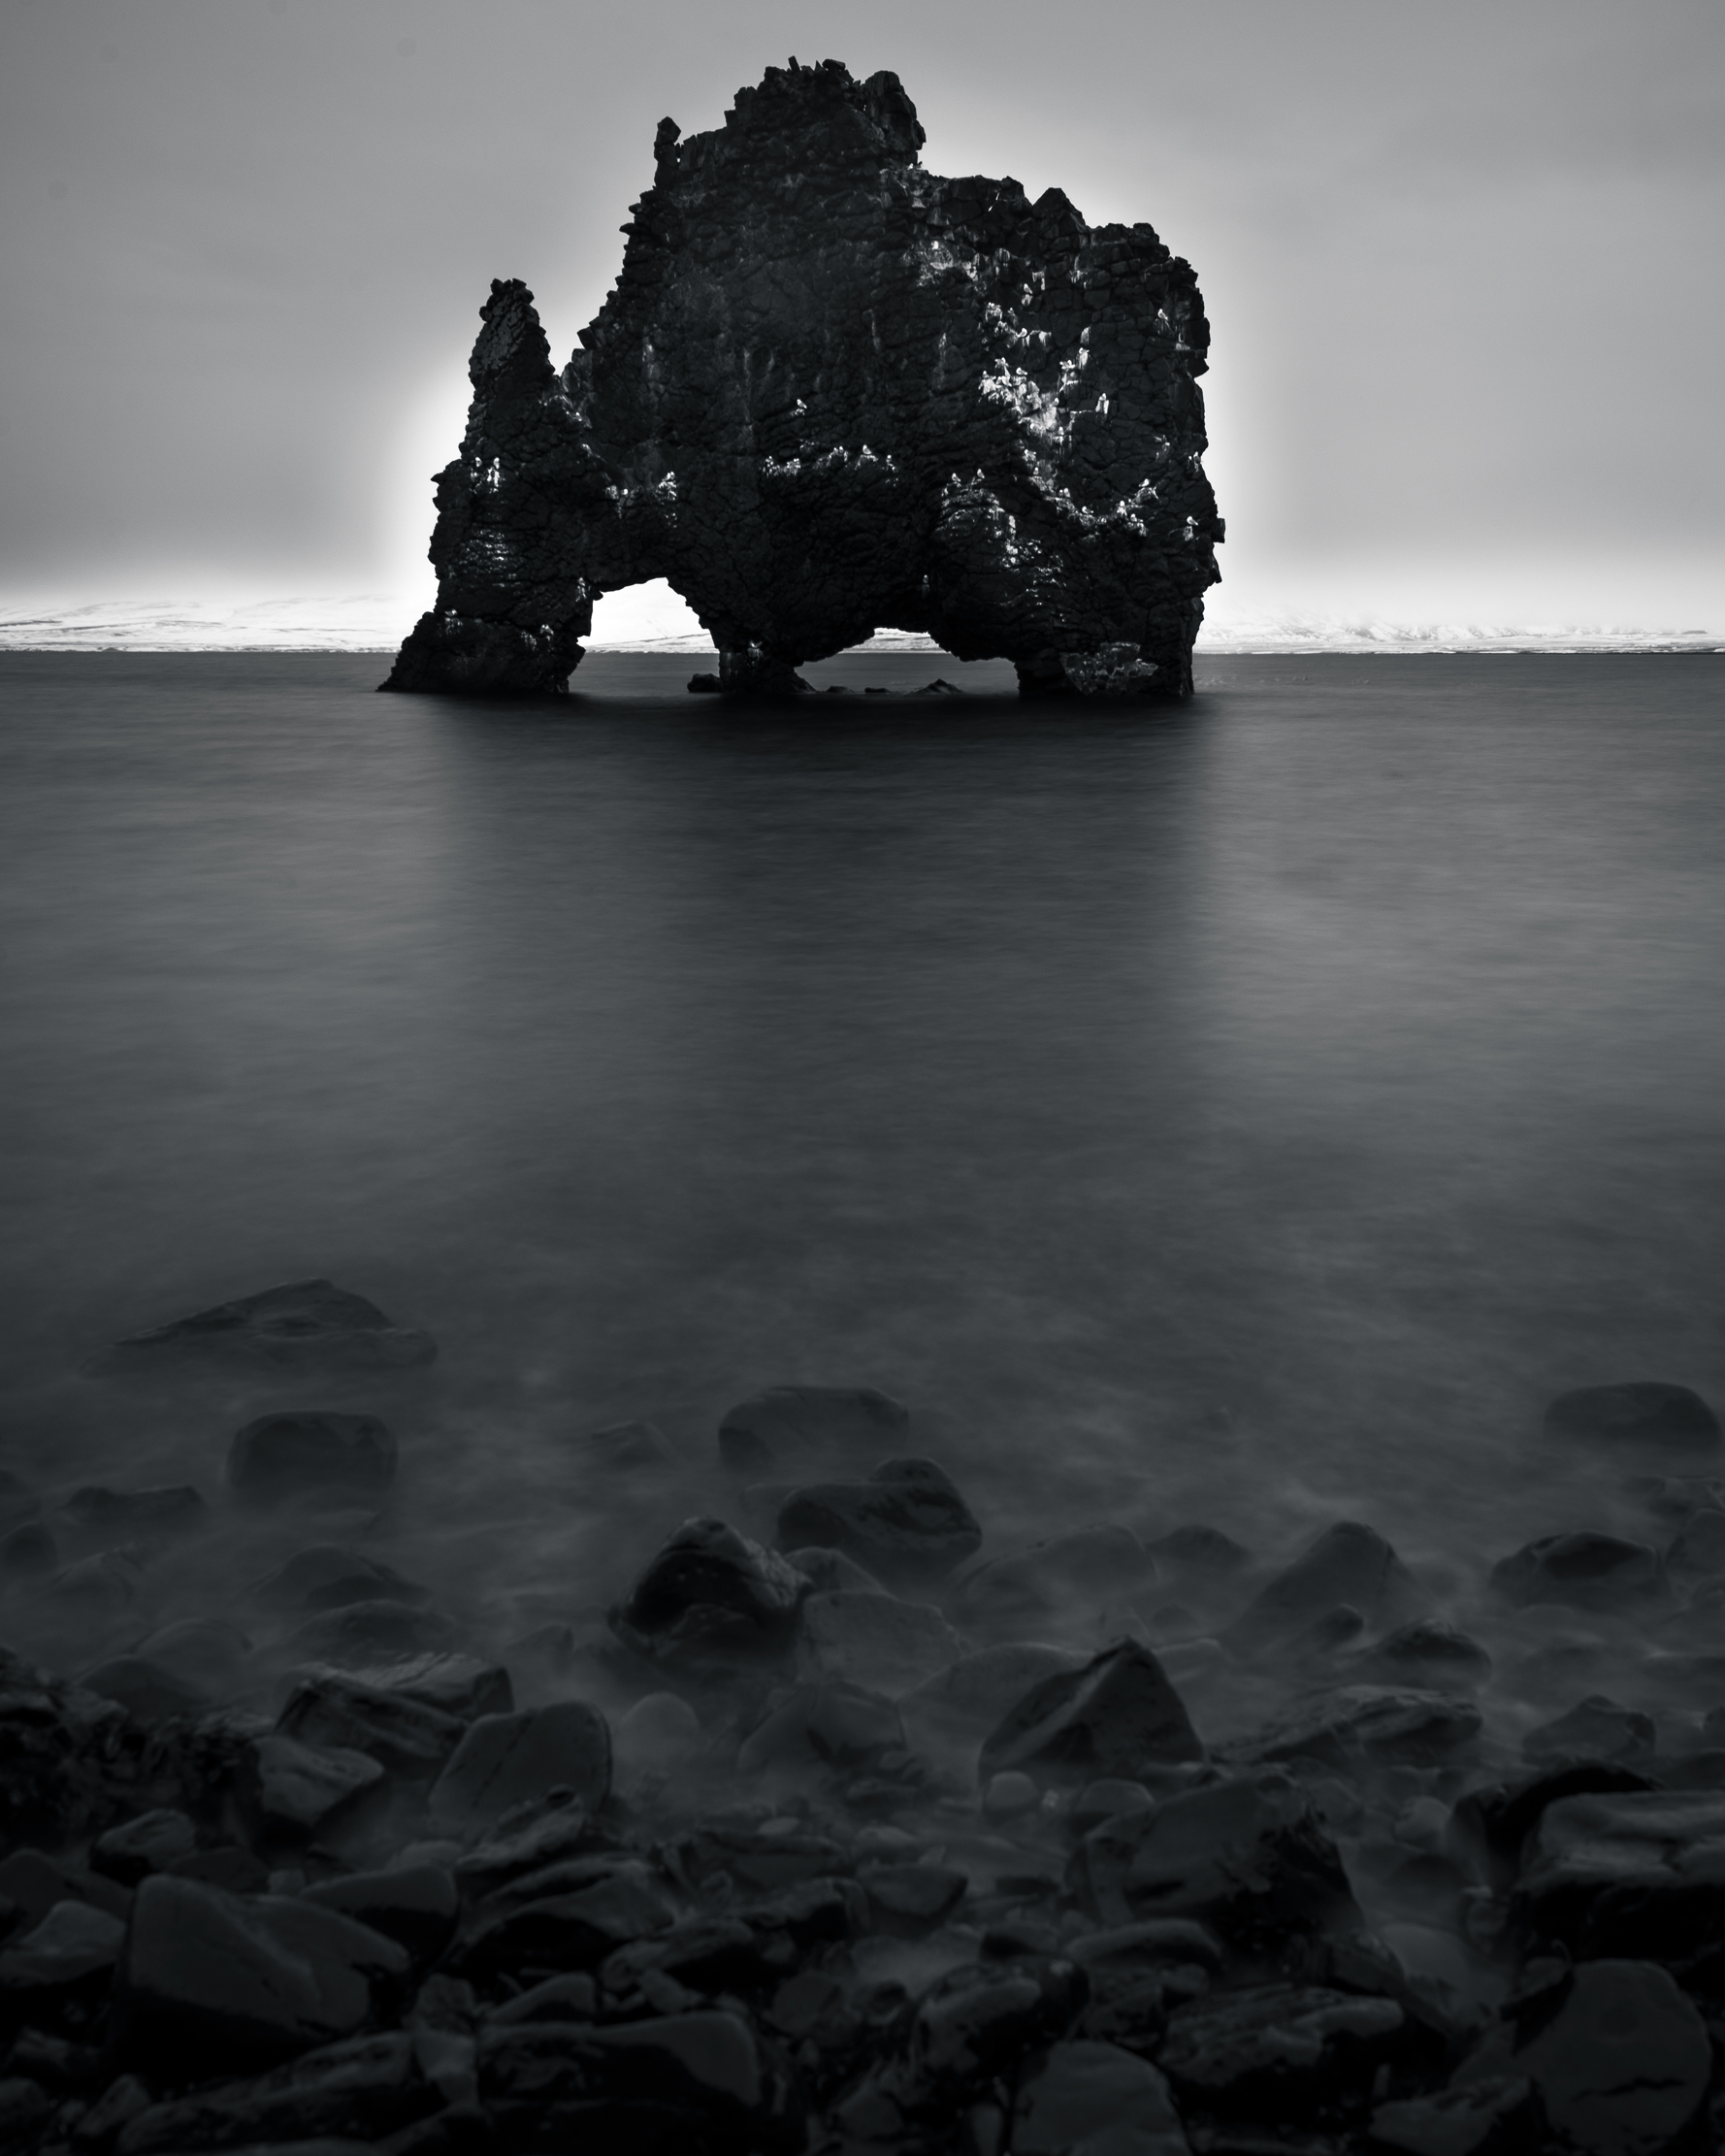
A rock that looks like an animal — and rewards the photographer who waits
Hvítserkur is a 15-metre basalt rock stack rising from the waters of Húnafjörður in northwest Iceland. Depending on the angle, the light, and your imagination, it resembles a drinking elephant, a dragon, or simply a piece of ancient geology that has no business being as photogenic as it is.
It is also one of Iceland’s most undervisited major photography locations — far enough from the main tourist circuits to see a fraction of the visitors that comparable formations on the south coast attract. For photographers who plan deliberately rather than following the standard itinerary, Hvítserkur is the kind of location that justifies the detour entirely.
I photographed it on a visit that came with a specific physical constraint — a recently dislocated shoulder that left me with one working arm. The result was a longer approach than planned, a more considered position than I might otherwise have chosen, and one of the stronger images I have brought back from Iceland.
At a Glance
Hvítserkur — Key Facts for Photographers
Ideal visit plan — arrive at low tide
The Location and Getting There
Hvítserkur sits on the eastern shore of the Vatnsnes Peninsula in northwest Iceland, approximately 200 kilometres north of Reykjavík via Route 1 and Route 711.
The access road: Route 711 runs around the Vatnsnes Peninsula and is a gravel road for most of its length. The surface is reasonable by Icelandic gravel road standards — manageable in a standard car in good conditions, more comfortable in a 4WD. Allow time for the gravel section and do not rush it.
From the car park: A short walk leads from the car park to the main viewpoint above the rock. The viewpoint sits on elevated ground and gives you a clear line of sight to Hvítserkur across the water — a useful position for scouting the scene and assessing tide conditions before committing to a longer approach.
Getting to water level: This is where the decision point is. From the viewpoint, informal paths — worn into the hillside by previous visitors rather than officially constructed — descend steeply toward the beach below. These paths are not marked, not maintained, and not necessarily the intended route. The slope is steep and the footing is variable, particularly in wet conditions. A sign warns of the risk of slipping.
On my visit, with one arm out of action, the steep descent was not a reasonable option. We took the longer route instead — a path that leads gradually down to the beach level further along the hillside and then back toward the rock. It takes more time but is significantly safer and, as it turned out, led to a better shooting position. On the return we did use the steeper path — but I would not recommend it as the primary approach, particularly in wet conditions or for anyone with any physical constraint.
Tidal Timing — The Variable That Defines the Photograph
Hvítserkur sits in tidal water. The difference between high tide and low tide fundamentally changes the photograph available to you.
Tidal Photography
High tide or low tide — two different photographs
Settings
Settings
The ideal visit: Arrive at low tide, work the beach compositions, stay through the tidal transition, and photograph the rising water at high tide. Two hours of tidal movement gives you both conditions and several distinct compositions at the same location. This requires planning the visit around the tide table — not the other way around.
At high tide: The rock appears to rise from open water. The foreground is water — which, with a long exposure, becomes a smooth plane of grey or silver. The rock’s arched “legs” disappear beneath the surface, giving it a cleaner, more monolithic appearance. This is the condition in the image above — a long exposure at high tide in black and white, with the rock silhouetted against a bright sky and snow-covered mountains behind.
At low tide: The beach is exposed. You can approach the rock on foot across wet sand and pebbles, getting close enough to appreciate its scale and the arch formations at its base. The texture of the beach — wet sand, pebbles, seaweed — provides foreground interest that high tide removes. The rock’s “legs” are visible and the animal resemblance is more pronounced from this position.
Both conditions are worth photographing. Plan your visit to arrive around low tide, spend time at the water’s edge as the tide rises, and if conditions allow, stay through the transition to high water. Combine tidal timing with the Iceland Light Calculator — Hvítserkur faces east across Húnafjörður, meaning morning light hits the rock face directly. Hitting both low tide and golden hour in the same window is the goal. The change in character across two hours of tidal movement gives you multiple distinct compositions at the same location.
Check tide times before your visit → Iceland Tide Calculator.
Photographic Tips
Light direction
Hvítserkur faces roughly west, which means morning light comes from behind the rock and produces the silhouette conditions visible in the image above — the rock in shadow against a bright sky. Afternoon and evening light comes from the front and west, illuminating the rock’s surface texture directly.
Both are valid photographic approaches. The silhouette in flat morning light produces a graphic, high-contrast image. The side-lit or front-lit rock in evening golden hour shows the basalt texture, the white bird droppings that give the rock its name (Hvítserkur means “white shirt”), and the colour variation in the stone.
Long exposure
Hvítserkur is an excellent long exposure subject. The rock is a fixed, stable point against moving water and sky. A 6 or 10-stop ND filter at high tide produces the glassy water surface that isolates the rock dramatically. At low tide, a shorter exposure of 1–4 seconds captures the movement of shallow water around the beach pebbles without completely smoothing it.
Focal length
A moderate wide angle (20–35mm) works well for the classic composition — rock centred, water or beach in the foreground, sky above. The vertical format suits this location well given the rock’s height relative to its width — worth considering if you normally shoot horizontal by default.
A short telephoto (70–100mm) isolates the rock against the mountains behind, compressing the distance between Hvítserkur and the snow-covered hills of the Vatnsnes Peninsula. This compression is strongest from the viewpoint above rather than from the beach level.
Wildlife
Seals use the area around Hvítserkur regularly. On my visit, a seal appeared repeatedly near the rock, surfacing and diving within the frame. At 200mm it was too distant for frame-filling images — a 300–400mm lens would have been the right tool. If seal photography is part of your plan, the longer reach is worth having.
Seals are protected under Icelandic law. Maintain a respectful distance and do not approach them in the water or on exposed rocks. If a seal shows signs of disturbance — raising its head, changing direction, leaving a rest position — you are too close.
Seasonal Character
Summer: The midnight sun gives you the unusual ability to photograph Hvítserkur in warm, low-angle light at any hour. The challenge is the wind — the Vatnsnes Peninsula is exposed, and summer does not guarantee calm conditions. The long exposure work that suits this location requires a stable tripod and patience in wind.
Autumn: The season I would recommend. Lower visitor numbers, the possibility of dramatic cloud formations over the fjord, and the light quality of September and October. Seals are present year-round.
Winter: Snow on the mountains behind Hvítserkur — as in the image above — adds a layer to the composition that summer cannot offer. The monochrome quality of a grey winter day suits the basalt. Access via Route 711 is generally possible in winter but check conditions.
Leave No Trace
Leave No Trace — Hvítserkur
What responsible visiting looks like here
Personal note: On my visit I had recently dislocated my shoulder and had one working arm. The steep descent was not an option. Taking the longer route instead led to a better position and one of the stronger images from that trip. The constraint produced a better result. Sometimes the slower path is the right one — not just ethically, but photographically.
Full Leave No Trace principles for Iceland: A Photographer’s Guide →
The informal descent paths are not marked trails. If you use them, do so with full awareness of the conditions and your own physical capability. The slope is steep, the ground can be wet and slippery, and a fall here is serious. The longer route to the beach is the recommended approach.
Do not disturb seals. The beach around Hvítserkur is seal habitat. Give them space, use a long lens, and do not attempt to approach for a closer image.
No rock climbing. Hvítserkur is not a climbing structure. The basalt is fragile and the height is significant.
Stay below the high water mark. The beach is publicly accessible at low tide. The farmland above the beach is private. The boundary is the high water mark — stay seaward of it.
Alternative: The Vatnsnes Peninsula Seal Colonies
The entire Vatnsnes Peninsula is known for its harbour seal population — one of Iceland’s most accessible seal watching locations. Several points along Route 711 give views of seal haul-out sites where the animals rest on exposed rocks and sand bars. A telephoto lens (300mm+) and a patient approach produce the best results. The seals are present year-round, with pup season in June and July.
Getting There
- From Reykjavík: Approximately 2.5–3 hours via Route 1 north to Hvammstangi, then Route 711 south around the peninsula.
- From Akureyri: Approximately 2 hours via Route 1 west.
- Nearest accommodation: Hvammstangi, approximately 30 kilometres from the car park.
- Fuel: Fill up in Hvammstangi before the peninsula circuit — there are no fuel stops on Route 711.
Sources
- Nature Conservation Agency of Iceland — nattura.is
- Vegagerðin (Icelandic Road Administration) — road.is
- Veðurstofa Íslands (Icelandic Meteorological Office) — vedur.is